Notes and checklists
Writing, checklists, mentions, images — and turning a line into a real task.
Notes is where the thinking goes: meeting notes, the plan for a job, the checklist for a site visit, the thing you would otherwise keep on a pad. A note can be private or shared with the whole workspace, and a line in it can become a task on someone's list.
Where it is. Click Notes in the bookmarks row under the top bar, or open Modules (top left) and choose Notes. On a phone, tap the three-lines menu icon at the top of the screen and choose Notes.
1. The Notes page
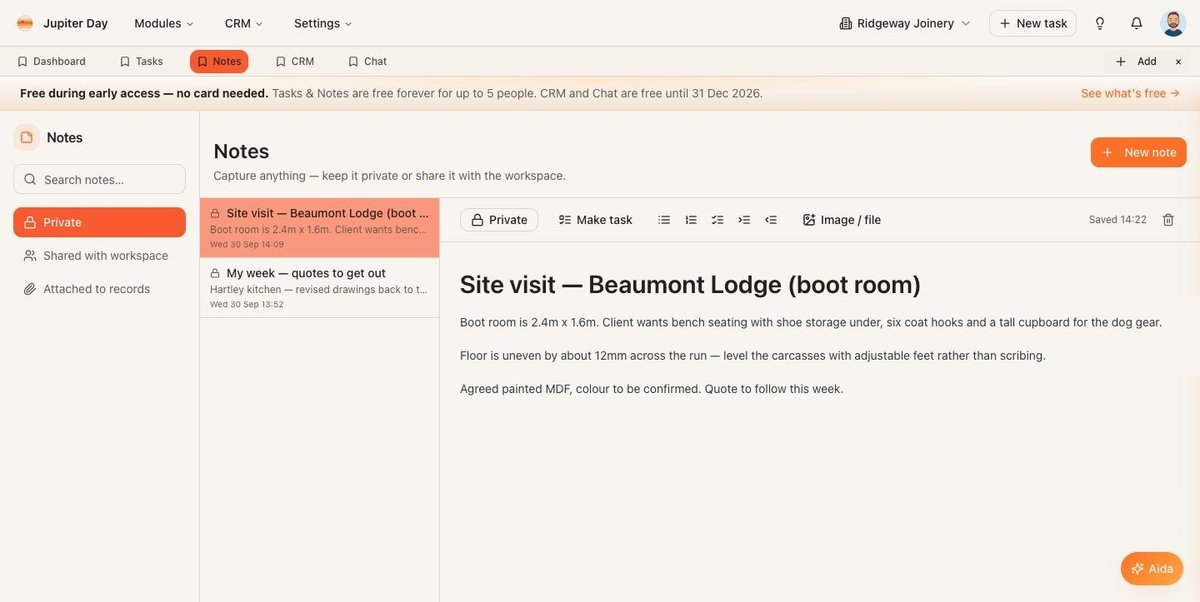
The Notes page: sections down the left, your notes in the middle, the note itself on the right.
The left-hand menu has three sections:
Private— notes only you can see.Shared with workspace— notes everyone in the workspace can read and edit.Attached to records— notes that live on a task (later, on a contact or deal).
Search notes… sits above the sections. The middle column lists the notes in the chosen section, newest edit first, with a one-line preview. The right-hand column is the note itself. + New note is the orange button in the top right-hand corner.
2. Writing a note
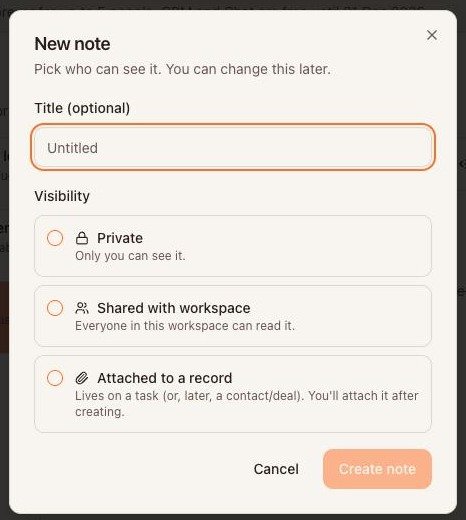
The New note window.
- Click
+ New note(top right). - Give it a title (optional — you can add one later) and choose who can see it:
Private,Shared with workspaceorAttached to a record. You can change this later. - Click
Create note. The note opens on the right with the title at the top and an empty page beneath. - Click into the page and write. Notes save themselves about a second after you stop typing — look for
Saved 12:57(the time) at the right-hand end of the toolbar.
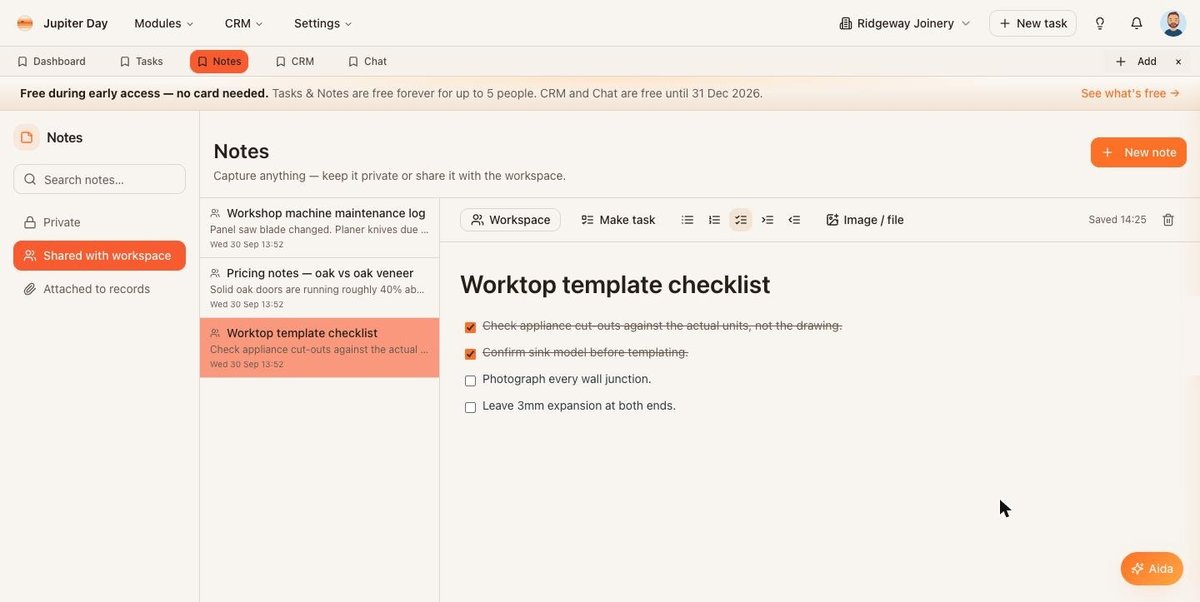
A shared note with a checklist: the toolbar across the top, the title, and the page.
The toolbar across the top of the note, left to right:
Workspace/Private/Attached— who can see the note. Click it to change. Only the person who wrote a note can make it private.Make task— turn the selected words into a task (section 4).- Bulleted list, numbered list, checklist — the three list icons.
- Indent and outdent — make the current line a sub-item of the one above, or move it back out (
TabandShift+Tabdo the same). Image / file— add a picture or a PDF.Saved …— when the note last saved.- Bin — delete the note (it asks you to confirm).
Bold and italic work with the usual keys (Ctrl+B, Ctrl+I; ⌘ on a Mac). Type @ and a name to mention a colleague — they are told in the bell, and on their phone if they have alerts on.
3. Checklists
For anything you want to tick off — packing a van, the steps of a site visit, the questions to ask on a call — use a checklist. Click the checklist icon in the toolbar, or type [ ] followed by a space at the start of a line. Press Enter for the next item; Tab makes an item a sub-item. Tick the boxes as you go.
A checklist line is a memory aid, not a task. It has no owner and no date, and ticking every box does not complete anything else. That is deliberate: the central task list only holds work that someone owns by a certain day. When a line really is a job for someone, promote it (next section).
4. Turning a line into a task
- Select the words that should become the task's title (double-click a word, or drag across the line). If you select nothing, the note's title is used.
- Click
Make taskin the toolbar. - The task form opens with that text as the title and the note attached. Choose who owns it and when it is due, then click
Create task. They are told, and it appears on the list like any other task.
5. Images and files
Click Image / file in the toolbar and choose a picture (PNG, JPEG, GIF, WebP or SVG) or a PDF, up to 25 MB. On a computer you can also paste a screenshot or drag a file onto the page. Pictures show inline; a PDF shows as a file card. Files are private to your workspace and are removed when the note is deleted.
Note. Photos straight from an iPhone are often HEIC files, which are not accepted. Take a screenshot instead, or change the iPhone camera setting to "Most compatible" (Settings › Camera › Formats).
6. Private, shared or attached
- Private — only you. Good for drafts and your own thinking.
- Shared with workspace — everyone in the workspace can read and edit. Use it for anything the team needs: meeting notes, plans, how-we-do-things.
- Attached — filed against a task (a task's own Notes area is separate from this; see the Tasks guide).
Change a note's visibility from the first button in its toolbar. It moves to the matching section on the left.
7. Notes inside tasks
Every task also has its own Notes box in the task form, for detail that belongs to that task alone — bullets, checkboxes and links work there too. Use the Notes module for anything wider than one task: a project, a customer, a recurring meeting.
8. A habit worth keeping
At the end of a meeting, spend two minutes turning the "we should…" lines into tasks with names and dates. The note keeps the discussion; the list keeps the commitments.